

In this article, we’ll see what a Simulink Signal Builder is and review the main things you need to know if you’re going to use them, such as how to:
- Add a point to a signal
- Add and delete signals from a Signal Builder
- Name the output signals
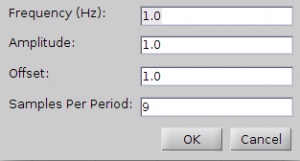
- Add a signal with a specific shape
- Set up the simulation time for your Signal Builder
- Use different tests in a Signal Builder
What Is a Simulink Signal Builder
Signal builders are used for creating tests in Simulink. Let’s say you’ve created a low-pass filter and want to make sure that you didn’t make any mistakes while developing it. You may want to input a signal to your low-pass filter such as different kind of sine waves with different frequencies and look at your filter’s behavior.
A Signal Builder also allows you to construct different kinds of test cases so that you are running all of them to study your model’s behavior.
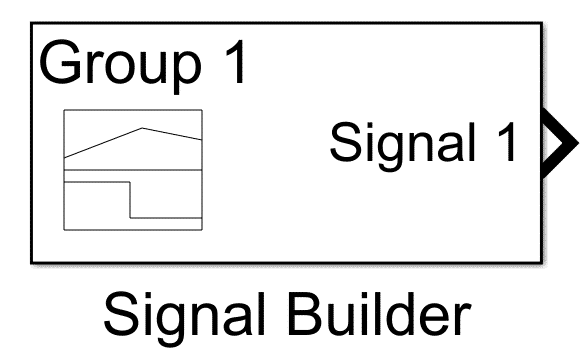
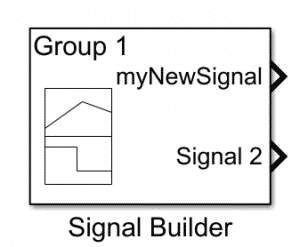
You can find Simulink blocks in the Simulink library at “Simulink/Sources.” Here’s what the Signal Builder block looks like:

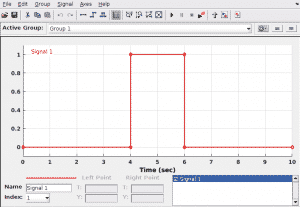
Here is what it looks like when you double-click on it:

How to Use a Signal Builder in MATLAB & Simulink
Add a Point to a Signal in a Signal Builder
As you can see, by default you have what is called “pulse signal.” If you click on the “Start simulation” icon inside the Signal Builder, you will run the simulation with this signal as an output of the signal builder.
You can modify the signal by clicking on one line or one point and moving it around. As you can see, this only modifies the location of the straight lines delimited by points or the location of the points. The issue is that there are only six points on this signal, so how do you add points?
To do that, you need to:
- Hold the shift key
- Click on the desired location of the point on the signal
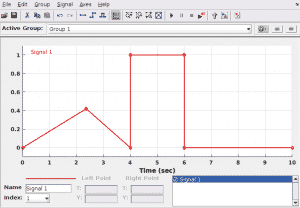
This allows you to create the signal shape that you desire in order to test your model:

Add, Delete, and Name an Output Signal in a Signal Builder
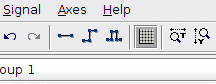
- Add a signal: if you want to add a new signal output because your model requires more than one signal, click on one of the three icons at the top of your Signal Builder. Using these icons, you have three choices: a “constant signal,” a “step signal,” and a “pulse signal.” Here’s what those icons look like:
- Delete a signal: if you’ve added a signal but you want to delete it from the Signal Builder:
- Click on the desired signal.
- Press the delete key.
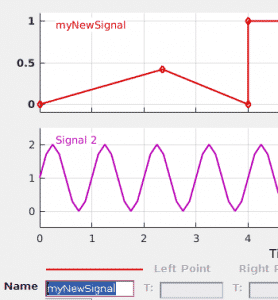
- Name a signal: Name your output signal by clicking first on the signal and then using the “Name” field at the bottom left of your Signal Builder:


Change the Simulation Duration of a Signal Builder
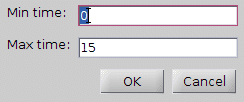
You may also want to modify the simulation time of your signal builder so that you can shape your signal after more than 10 seconds from the start of your simulation. You can do that by going to Axes > Change Time Range… and setting a higher value for the “Max time” field:

Signal Builders and Tests
Add a Test Case to a Signal Builder
- Regression testing: In a signal builder, you can add different test cases, that allow for regression testing of your model. That means that if you create a few test cases for your model, you can run all of them and compare the outputs to a previous version. This is to make sure that if you fix a bug, you don’t modify your model’s behavior in unhelpful ways.
- Testing throughout implementation: If you modify your model, you can also make sure that the modification altered your model’s behavior in the way you wanted. Let’s say that you have a satellite model with different modes (e.g. idle mode, safe mode) that are activated when certain conditions are met. To ensure that it will work the way you want if you modify the activation conditions of those modes you may want to create a test case that corresponds to the activation/deactivation of those conditions.
So, to add a test case to a Signal Builder:
- Click on the gear at the top right of your Signal Builder.
- Click Copy.
Run a Specific Test Case
If you want to run a specific test case:
- Select it by using the drop-down menu
- Click the run icon in your signal builder.
Run All of the Test Cases of Your Signal Builder
You can also run every test case of your model at once. This can be useful if you want to compare your model against an earlier version by observing the differences of behavior between those models for the same set of test cases.
It is also very useful if you want to improve the coverage of your model because if you add test cases, the model coverage will improve provided that the additional tests are activating parts of the model that the existing ones didn’t.
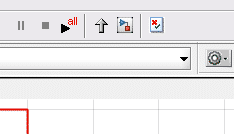
To run all test cases, you can click “Run all and produce coverage” at the top of your Signal Builder:

Key takeaways:
- The signal builder block in Simulink allows you to test your model.
- You can add a point to a Signal Builder by:
- Holding shift.
- Clicking the desired location on your signal.
- Add a signal by using the icons:
- Delete a signal by:
- Clicking on it.
- Pressing the delete key.
- Name an output signal using the “Name” field at the bottom left of your Signal Builder.
- You can add test cases to a Signal Builder by clicking on:
- The gear at the top right of your Signal Builder.
- “Copy.”
- The gear at the top right of your Signal Builder.
- You can run a specific test case of your signal builder by:
- Choosing it in the drop-down menu.
- Clicking the “Start simulation” icon.
- Run every test case by click on “Run all and produce coverage” at the top of the Signal Builder.
For more information, you can refer to the MathWorks documentation about the Signal Builder block: