In this article, you will learn the smallest structure to create a Latex document, including how to:
- Use minimal code
- Structure your document: section, subsection, etc.
- Generate a table of content
- Add a title
- Change the default font
- Add bullet points
- Define a variable
- Include a picture
The Minimal Code
The minimal code for writing words in a Latex file is the following:

\documentclass[10pt]{article}
\begin{document}
First words using Latex.
\end{document}
This generates a blank document with “First words using Latex.” written on it.
Structure Your Document: Section, Subsection, etc
If you want to add sections to your document, you can do it as follows:
\documentclass[10pt]{article}

\begin{document}

\section{First Section}
\subsection{First Subsection}
\subsubsection{First Subsubsection}

\end{document}
Generate a Table of Contents
You can generate a table of contents automatically from the content of the document (Be careful! You need to compile the document twice to make the table of content appear.)
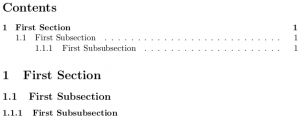
\documentclass[10pt]{article}

\begin{document}

\tableofcontents

\section{First Section}
\subsection{First Subsection}
\subsubsection{First Subsubsection}

\end{document}
Add a Title
To add a title to the document, you can write the title outside the document (before “\begin{document}”) and place it where you want it to appear in your document:
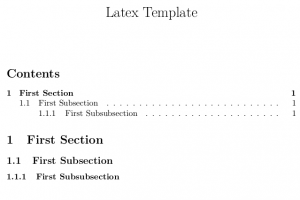
\documentclass[10pt]{article}

\title{Latex Template}
\date{}

\begin{document}

\maketitle
\tableofcontents

\section{First Section}
\subsection{First Subsection}
\subsubsection{First Subsubsection}

\end{document}
I removed the date in the code above, but without the command “\date{}”, the date will appear under the title.
Change The Default Font
Let’s spruce it up a little by using a different font. For this, you need to use the command “\usepackage{fontName}” outside the document:
\documentclass[10pt]{article}
\usepackage{mathpazo}

\title{Latex Template}
\date{}

\begin{document}

\maketitle
\tableofcontents

\section{First Section}
\subsection{First Subsection}
\subsubsection{First Subsubsection}

\end{document}
You can choose from among several fonts (e.g. “lmodern,” “mathptmx,” “bookman,” “newcent,” “utopia,” “charter”).
Add Bullet Points
You can also add bullet points to your document:
\documentclass[10pt]{article}
\usepackage{mathpazo}

\title{Latex Template}
\date{}

\begin{document}

\maketitle
\tableofcontents

\section{First Section}
\subsection{First Subsection}
\subsubsection{First Subsubsection}
\begin{itemize}
	\item First bullet point
	\item Second bullet point
\end{itemize}

\end{document}
Define a Variable
One of the major advantages of Latex is that you can define variables using “\newcommand{\commandName}{content}” and label them inside your document:
\documentclass[10pt]{article}
\usepackage{mathpazo}

\title{Latex Template}
\date{}

\newcommand{\thisWillProbablyChange}{Jessica}
\begin{document}

\maketitle
\tableofcontents

\section{First Section}
\subsection{First Subsection}
\subsubsection{First Subsubsection}
\begin{itemize}
\item First bullet point
\item Second bullet point
\item \thisWillProbablyChange, you are my everything.
You are my light, and you've shown me more love than I've ever known.
I choose you, \thisWillProbablyChange, to be my partner.
\end{itemize}

\end{document}
This step is key when you know that something is likely to change or is currently unknown. This keeps the lack of knowledge about the content from impeding the progression of your document.
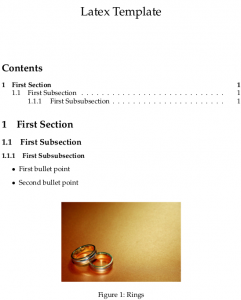
Include a Picture
Finally, if you want to include a picture, you can do this by adding the package “graphicx” (\usepackage{graphicx}). Then, you have to use the environment “figure” as follows:
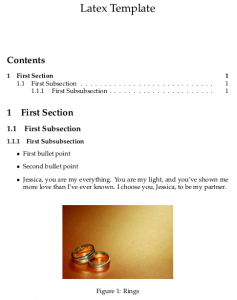
\documentclass[10pt]{article}
\usepackage{mathpazo}
\usepackage{graphicx}

\title{Latex Template}
\date{}

\begin{document}

\maketitle
\tableofcontents

\section{First Section}
\subsection{First Subsection}
\subsubsection{First Subsubsection}
\begin{itemize}
\item First bullet point
\item Second bullet point
\end{itemize}

\begin{figure}[h]
\begin{center}
\includegraphics[width=0.5\linewidth]{rings}
\caption{Rings}
\end{center}
\end{figure}

\end{document}
- \caption{Rings} means that the title of the picture will be “Rings”.
- [width=0.5\linewidth] means that the width of the picture takes half the width of an entire line of text.
- “rings” is the relative path to the picture; the picture “rings.png” is located in the folder containing the .tex file.
- The argument [h] is used to make Latex put the picture at the current location (relative to the rest of the code) as opposed to a position on the page independent of the position of the “figure” environment in your code.
🌱 From the basics of LaTeX we’ve covered, let’s take a leap into how you can make your life easier with MATLAB. Ever thought about ditching the manual grind for something slicker? This guide’s got you covered, especially if you’re looking to automate those LaTeX reports. Imagine generating complex reports with a few clicks, or transforming data into polished LaTeX documents without the hassle. This small reference book is about leveraging MATLAB to cut down on the tedious work, freeing you up to focus on what matters most. Plus, it doesn’t stop at LaTeX – think Excel reports, Word documents, and user-friendly interfaces to streamline your entire workflow. Ready to work smarter? This is your gateway.